Recently I had to set up a raspberry pi without using a monitor and keyboard like they recommend. A few parts of the process felt unintuitive so I figured I’d write a short guide for setting up the pi using a direct ethernet connection and no external monitor/keyboard/mouse. Here’s what you’ll need:
- Raspberry pi
- Computer (mac for this guide)
- Ethernet cable (and adaptor if necessary)
- SD card (and adaptor)
- Micro usb cable
I won’t dwell on the initial setup too much but you’ll first need to flash the .img file onto your SD card to plug into the raspberry pi. You can download Raspbian from the official raspberry pi site here (https://www.raspberrypi.org/downloads/raspbian/). You will only need the lite to log on with ssh however to use the desktop you’ll have to at least download Raspbian Stretch with desktop. From here, you will need to plug your SD card into your computer and use the Disk Utility (or Etcher which is a little more intuitive, https://www.balena.io/etcher/) to flash the .img file onto your SD card. You may have to wait a while, as this takes a few minutes.
Once this is done you will not want to eject just yet, as SSH is disabled by default by the Raspbian community for security reasons. Normally you’d log on with a monitor to enable it, but here we’ll be going into the drive to add an empty file called ssh. In this example, my SD card is named “boot”. You’ll type the following commands into your terminal:
$ cd /Volumes/boot/
$ touch ssh
And that’s it; you can eject the card and plug it into your raspberry pi.
In this example we’ll be powering the raspberry pi through the micro usb cable, and connecting with internet through the Ethernet cable.
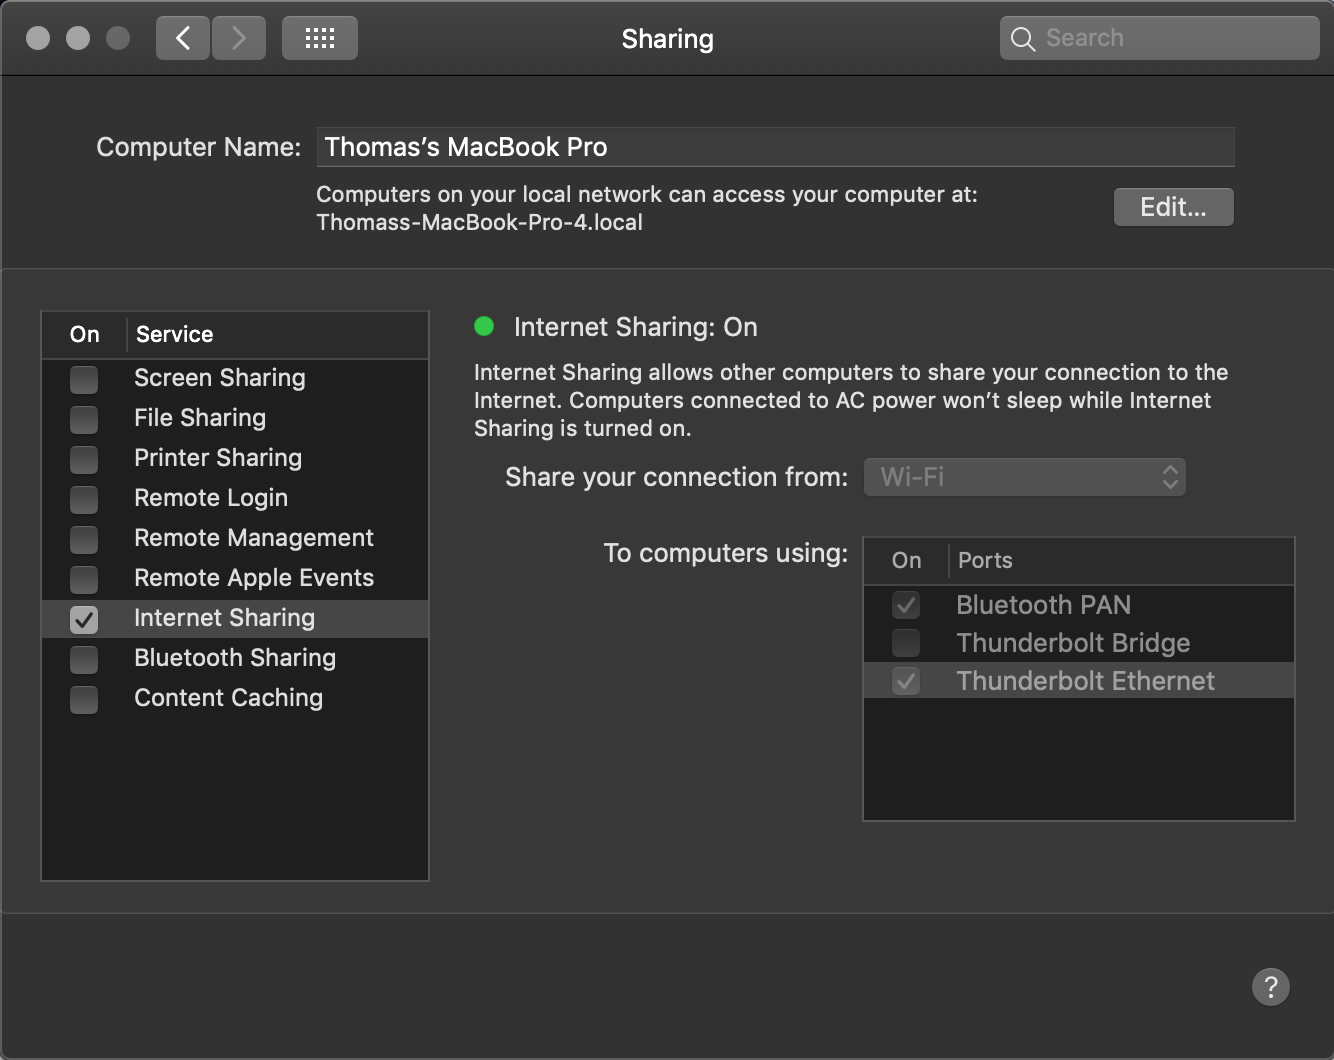
To set up the Ethernet connection, you’ll want to open the system preferences and go into Sharing. In Internet sharing you’ll want to make sure thunderbolt Ethernet is checked. I have a 2013 macbook pro, depend on the model yours may just say Ethernet port or Ethernet through usb-c.
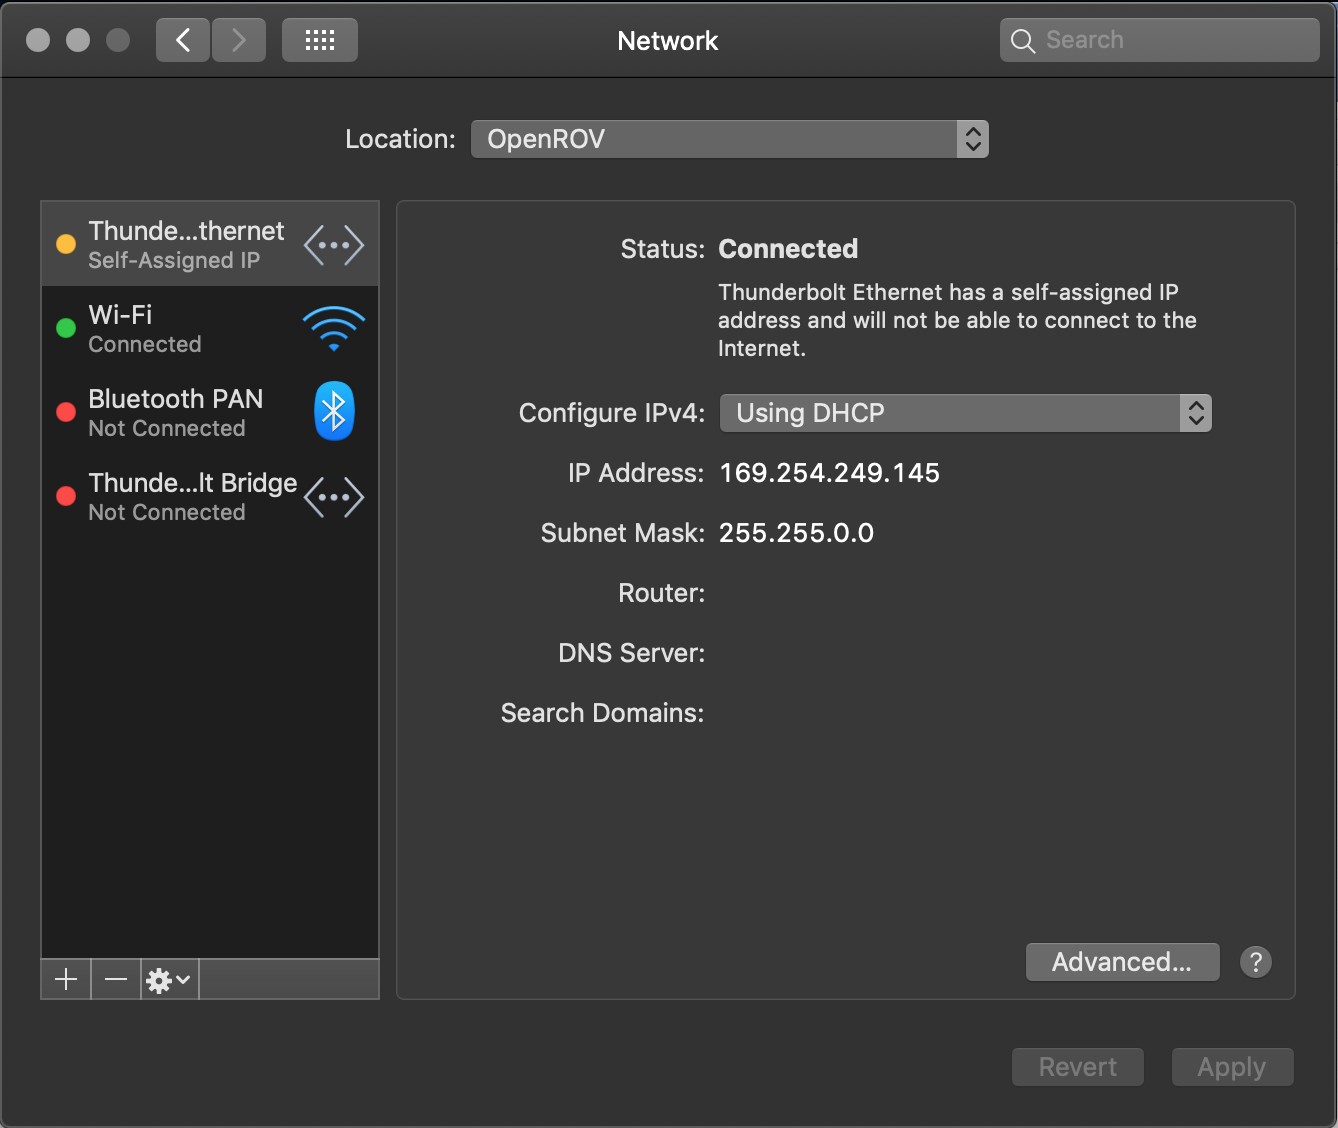
From here you’ll go back to system preferences and open up Network. Select Thunderbolt Ethernet and make sure IPv4 is on automatic. If you have a static IP address, you can change it to DHCP manual and set an address, and then it’ll set the subnet mask for you automatically.
Now you can plug in the Ethernet cable into your pi, and connect the micro usb to the pi as well. You should see the light turn from red to yellow on the Networks tab, and it should choose a host address and a subnet mask.
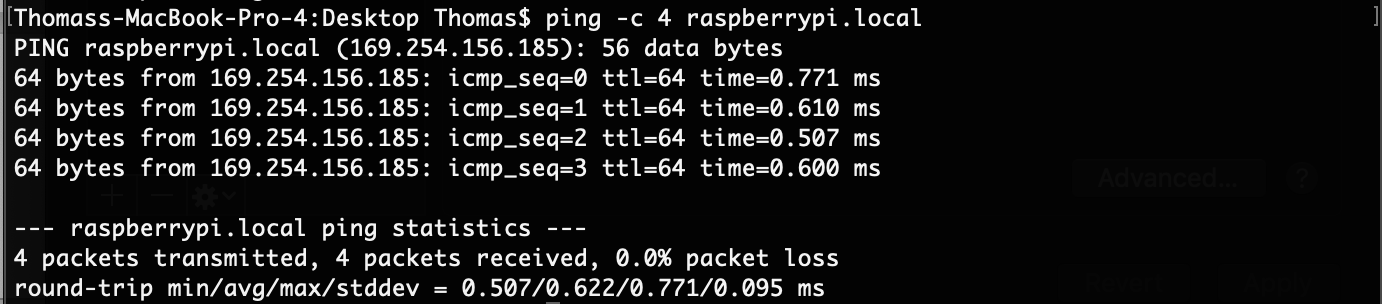
Now you’ll need your pi’s IP address. To get this you can use a few different methods. The easiest way is just to use the alias raspberrypi.local, which will act as the IP address (this can be used instead of your IP in most cases as well). So for example if you typed in ping –c 4 raspberrypi.local it would ping the raspberry pi and it would show you the IP address. You may also enter ifconfig into your terminal, and the address will be under en_ and won’t be the host address. Lastly you can use \nmap –sn IP-addr/CIDR to list all the devices on that IP address with that mask. So in my case I would type in nmap –sn 169.254.1.1/16, or if you had a subnet mask of 255.255.255.0 you could use nmap –sn 169.254.249.1/24.
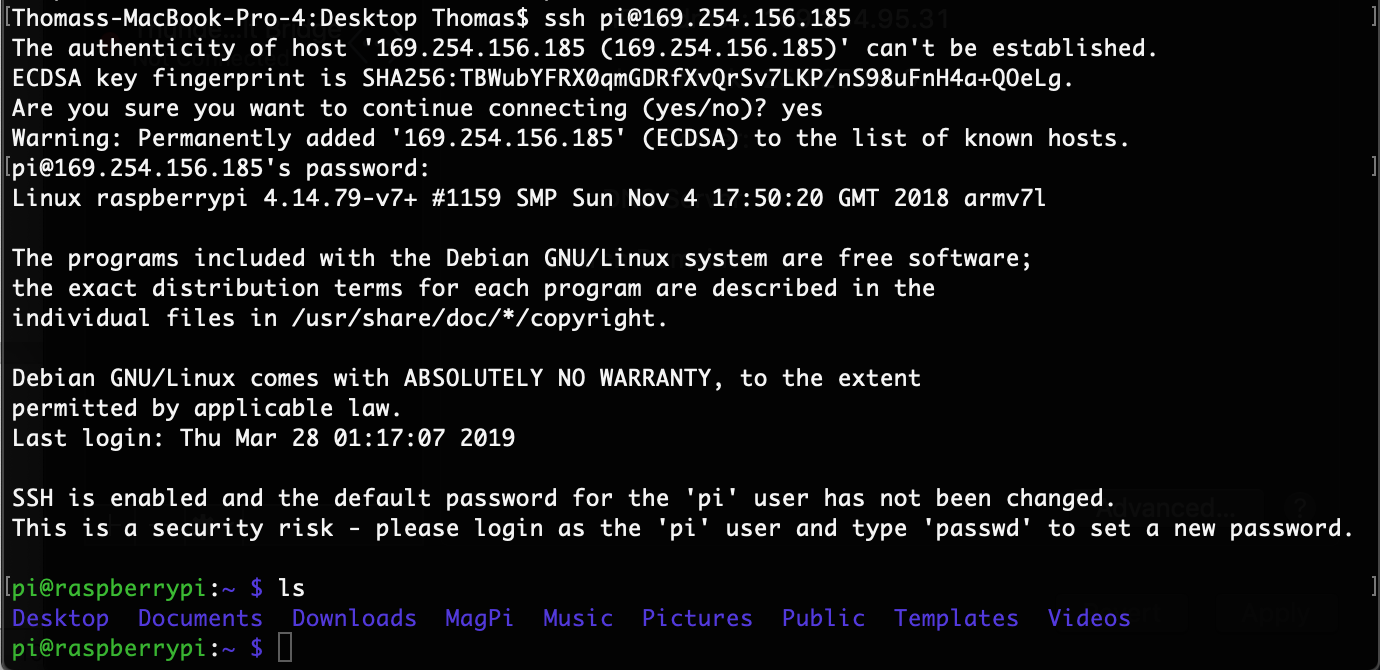
In my case I had an address of 169.254.156.185, so I simply ran ssh pi@169.254.156.185 and used the default password raspberry (the default is raspberry) to log into the pi. From here you've ssh'd in, and you can leave the session by simply typing exit and hitting enter.
So that’s it; you may go from there, but you won’t be able to get access to the internet outside of the pi. To connect, I’d recommend this guide here (http://www.circuitbasics.com/raspberry-pi-wifi-installing-wifi-dongle/). Otherwise you can try connecting this to your router with an ethernet cable and powering it, which should allow you to connect to it using the same alias while allowing you to run commands like sudo apt update.